Creating Your First Page
With development mode enabled, you can create your first Visualforce page by entering a URL for the page in your browser's address bar as follows:
https://***Salesforce_instance***/apex/myNewPageName
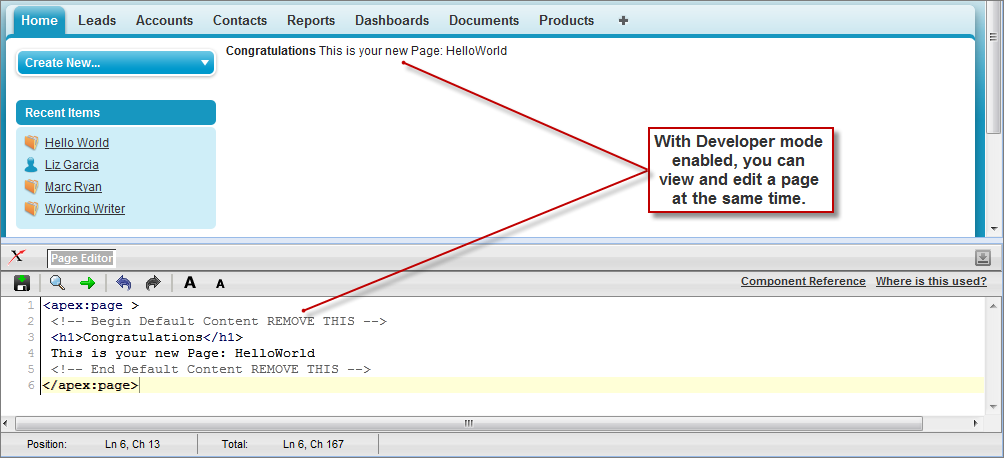
For example, if you want to create a page called “HelloWorld” and your Salesforce organization uses na3.salesforce.com, enter http://na3.salesforce.com/apex/HelloWorld.Because the page does not yet exist, you are directed to an intermediary page from which you can create your new page. Click Create Page <myNewPageName> to create it automatically.You now have a Visualforce page that includes default text. To edit your new page, click the Page Editor bar that appears at the bottom of the browser. It expands to show you the following Visualforce markup:<apex:page> <!-- Begin Default Content REMOVE THIS --> <h1>Congratulations</h1> This is your new Apex Page: HelloWorld <!-- End Default Content REMOVE THIS --> </apex:page>This default markup includes the only required tag for any page— the <apex:page> tag that begins and ends any page markup. Embedded within the start and close <apex:page> tags is plain text, some of which is formatted with a standard HTML tag, <h1>.As long as you keep the required <apex:page> tag you can add as much plain text or valid HTML to this page as you want. For example, after entering the following code and clicking Save in the Page Editor, the page displays the text “Hello World!” in bold:<apex:page> <b>Hello World!</b> </apex:page>

No comments:
Post a Comment